Friday, October 28, 2011

For the Love of Starbucks

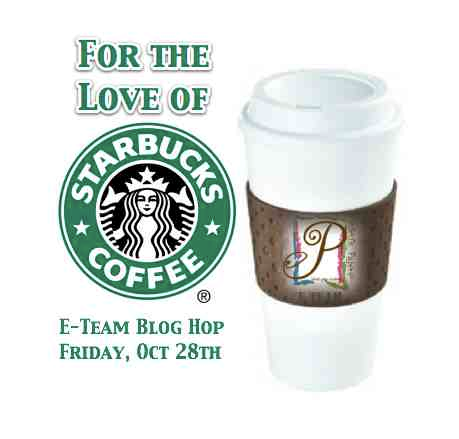
Hey People!  Are you ready to join the E-Team for another eclectic challenge?!  Daisy thought it was time for some early Trick or Treating!!  Today the Team was challenged to join in For the Love of Starbucks.

Here's the challenge recipe:  Use any of the Maya Road Bottle caps.


And combine in your favorite Starbucks inspiration!! 

Since so many enjoy a treat from Starbucks, we're inviting YOU, dear readers, to join along in the fun!!  Now, before you start stressing on all these creative calories, your challenge will be to use the Seasonal Distress Inks and find inspiration from Starbucks.  This can be the colors, the smells, the atmosphere, whatever.  If you happen to have some of the fun Maya Road bottle caps, by all means!! Drag them out and go for the full fledged grande! Just as a disclaimer:  IRL, I REFUSE to say grande, latte or whatever Starbucks calls their cup sizes.  Large, medium and small, works fine for me, thank you very much!  We'd love to see what your Love of Starbucks inspires you to create!  Post your creations to the ep blog to Mr. Linky, by November 15th (the E-Team's next scheduled blog hop), for your chance to win a $10 Starbucks gift card tucked into a box full of eP goodies!!  Winner of the challenge will be announced at the next blog hop.

Of course there will still be three random winners chosen from all the comments left on the E-Team member's blogs.  Those winners will receive a $20 gift voucher to the eP store!  Leave your comments until Sunday, Oct. 30.  The gift voucher winners will be announced late Monday, Oct. 31, on the ep blog.

E-Team Inspiration
Micki 
And
ME!!

Linda D. is sitting out this hop.  She is taking time to welcome the newest grand baby to her family!  Make sure you drop by and give some congrats!
Sherry is also sitting out this hop, but stop by and tell her she was missed!!


My project began with the embossed gift card that Daisy so generously tucked into my challenge package.  I love the image and wanted to use it, but it had this annoying crease.  I used a ink loaded sponge to bring out the contrast between the embossed image and the kraft card stock. 


From an annoying crease came this idea: 

Bottle cap magnets!! 

I first applied a coat of Claudine's Charcoal Black semi-gloss paint to the inside of a Jumbo bottle cap and two Super Mega bottle caps.   I didn't worry about perfect coverage, as I liked some of the aluminum peeking through the black. 

 For the largest magnet, I traced the image onto some tissue paper and then traced that image onto a piece of Poison Ivy metal.  After embossing the image I filled it in on the back with some embossing paste, to prevent me from smashing all my hard work.  Tip:  light weight spackle will also work for this step.  I chose not to sand off the color on the raised elements, but instead used a brass brush to give a matte finish to the background.  I cut the image out with a Classic Circle Spellbinder's die and adhered the image to the inside of the bottle cap with dimensional tape.  I die cut two stars from the smallest of the Star Five Spellbinders dies and popped those onto the front of the image with more dimensionals.  Two oz of Ice Resin was then poured over the metal and set aside to dry over night.  The next day, I cut another small star from the metal and adhered that to the Resin with a double layer of dimensional tape.  Then another 2 oz of Ice Resin was applied.


I wish I could photograph how cool the Ice Resin looks with this!!  Go figure that I would choose to create something that has multiple mediums that all show glare!!

The middle magnet was inspired by a quote that my cousin posted onto Facebook.  I began with the Wrinkled Free technique, Version Me, with Distress Peeled Paint, Seasonal Seedless Preserves and Ripe Persimmon with a misting of Tattered Angel's Pearl and Antique Brass Glimmer Mist.  I then covered both sides of the paper with Studio Matte Medium, which, to be honest, totally negated the Glimmer mist!!  But!  if the paper was not sealed, it would become transparent when covered with the Ice Resin.  The paper was then cut out with a Spellbinder Classic Circle die and taped to the inside of the bottle cap. 


The saying itself, was printed out onto regular copy paper and then traced onto more Poison Ivy metal.  Some of the words were embossed and some debossed.  The brass brush was again used to give a matte finish to some of the panels.  I popped up some of the words with dimensionals.  Just one layer of Ice Resin (2oz) was used to cover the metal.


The last magnet was inspired by my word for the year.  At the beginning of the year, there were several blogs and conversations regarding what your word for the year was going to be.  Mine was Leap.  If you'd like to read the details of the choosing of that particular word, you can find it here. 


Notice those tiny air bubbles by the "L" and "A"?  This is the only magnet that ended up with them.  I'm thinking that the cold night temperature that this one cured in may have resulted in those. Not terribly obvious, but there. 

More Poison Ivy metal was cut with a Classic Circle die and embossed with Sizzix's Diamond embossing folder.  I sanded off the raised parts, exposing the aluminum. The metal was adhered to the bottle cap with dimensionals.  I then spelled out Leap with idea-ology Type Charms and covered the letters with the included epoxy sticker.  The charms were attached to the chain of an altered swival clasp (I just removed the clasp part) with jump rings.  I popped up the letter "E" with two dimensionals  and "P" with  one dimensional, but could not get a photo to show that.  After carefully arranging the charms how I wanted, I covered everything again in one layer (2oz) of Ice Resin


Self adhesive magnetic strips were applied to the back and WAH-La!!  Inspriational magnets for my refrigerator!!


Hope you join in on the Love of Starbucks Challenge!  I'll be checking the blog for your creations!  Till then.......Believe and LEAP!!

Wednesday, October 26, 2011

Guilt

Guilt.  I swear I am the QUEEN of quilt. 

As well as the QUEEN of procrastination.

And .....wait....we were discussing guilt. 

I'm trying to work on relinquishing my crown of Guilt.

Guilt over the fact that my house is a disaster.
Guilt that I ate a PayDay candy bar for lunch (as in it was my lunch).
Guilt that I haven't exercised for 4 days.  (did I mention that PayDay's are my favorite lunch of late?!)
Guilt that I haven't walked the dog for 4 days.
Guilt that I don't post every day.  Or every other day.  Or even weekly.

I wear a HUGE, blingy crown of Guilt. 

But, I need to realize that the Princess Crown of Guilt fits me better.  I can only be Queen of so many things, so I'm keeping the crown of the Queen of Procrastination.  And the crown of Queen of the House (disaster that it is). And possibly a couple of other Queen crowns too.  But, I'm going to try downsizing to the Princess crown of Guilt. 

So, what does all this mean?

Yep.  No actual project to share today.  But, I can PROMISE you one on Friday.  AND I think it is kinda cool.  Out of my usual mold.  Rather artsy, if I do say so myself.

Check back on Friday. 


Thursday, October 20, 2011

Riding a Bike

Hey People!  I hope that your week has been a good one!  I'm not sure how it has gotten to be late Thursday already!  But hey!  The weekend is upon us!!  The Toad and the Oldest Kiddo will be attending the Kiddo's first live rock concert this weekend, while the Youngest Kiddo and I take in the action movie Real Steel.  I would vote for Footloose, but don't think that suggestion will fly until the manly man movie is seen!! LOL!!

Needed a birthday card for my father in law today.  Now, just in case you are a new visitor to this little blog o' mine, bicycling is LIFE in this family.  There was a time, before children, that it wasn't a matter IF we would ride, but WHERE we were going to ride.  So, it seemed only appropriate that I incorporate the bicycle theme into the birthday card.


I searched the web for a bicycle type quote, got brave and used PSE9 to lay it out more fancy like, and printed it out onto SU's Very Vanilla because my printer HATES Pure Luxury!!  I die cut the image with Spellbinder's Labels Twelve.  While the die was still in place, I lightly sponged around the edges with Distress Ink Antique Linen.  A very minimal sponging was done along the outer edge with Distress Gathered Twigs.  The sentiment was then adhered using dimensionals. 

The card base is (of course) Pure Luxury Ivory 5 1/2" square.  A small mat of basic black is behind the dp from the Kraft Resist Idea-ology line Paper Stash.  I lightly sponged more Gathered Twigs ink along the edges of the resist paper. 

The bicycle is from a Glimmer Glass collection, Clear Destination, from Tattered Angel's that I have had in my stash for waaaaay too long!  I snipped teeny, tiny little pieces of dimensionals and carefully placed them behind the more solid portions of the image.  I did color the edges with a black marker to hide the white tape from a side view.  Some 1/2 pearls were adhered in the corners, a little library clip to the sentiment and called it done!

Pretty CAS, but hey!  It's for a guy who thinks riding a single speed is all you need. Actually, who thinks that riding period is all you need!!  Perfect for him.

That's it for me today!  I have another idea in the works on my desk.  I'm hoping to get that finished this weekend!  Until then.................enjoy the Ride.....


Friday, October 14, 2011

Thankful

Hey People!!  It's time for another hop with the E-Team!!  We are continuing with out Seasonal theme by  show casing our Thanks with any type of project except a card!!


And what would a ride with the E-Team be without some wonderful goodies?! Leave a comment on the participating team member blogs and be entered at the chance to win one of THREE (3) $20 gift vouches to the eP store!! 

But!  That's not all!! Make sure you also leave a comment on the eP blog for Daisy, as I hear rumors that a random winner will be chosen from those comments to win a surprise box of goodies!!

The E-Team
and
Latrice and Micki are sitting out this hop.  You can visit them and let them know how much they were missed!

When I think of things or words that are synonymous with Thanks, several thoughts come immediately to mind:   Fall, Family, The Toad, The Kiddos.  I chose to focus on the fall theme and my kiddos for this project.


It would seem that somebody, who shall remain nameless, forgot to read the fine print about using a "Tag or ATC" in the project!! oops!!


I am very thankful that while my boys are three years apart in age, they get along well (90% of the time) and are truly friends.  I decided to make a wall hanging from a photo that was taken on a family hike this past spring.  I LOVE photos of my kids from behind!  They are totally in their own world, unaware of the camera.  There is no obnoxious posing, goofy faces or rolling of the eyes when I ask for another "decent" picture attempt!!

I first altered the photo in Photoshop Elements using the sepia effect.  I then printed the photo out on Claudine Hellmuth's sticky back canvasYes!  This canvas works wonderfully in your printer!  And trust me, if it goes through my finicky printer, it will work in yours!  The leaves were made with the Wrinkle Free Distress technique, version Me.  I smooshed some Distress Ink in Spiced Marmalade, Fired Brick and Peeled Paint onto my craft sheet and misted heavily with a combination of Tattered Angel's Glimmer Mist in Tuscan Sun and Meadow Green.  I then layed Pure Luxury Ivory card stock in the beaded ink.  Falling Leaves were stamped on the paper with more Fired Brick or Peeled Paint and sponged along the edges.  I love the fine, almost lacy detail, of these stamps!  Alpha Parts, Ransom, letters were used to frame the photo.

close up of the canvas and detail of the leaves

To complete my wall hanging, I adhered the sticky canvas to black foam illustration board that I cut to size.  I then made my dimensional frame with some braided trim that has been in the garage for years!  I  dug out The Toad's miter box and cut  the trim to make a fitted frame.  Not perfect, but not bad for my first time at a mitered cut!!  I then painted the trim with Claudine's Charcoal Black studio paint.  Note:  this paint is soooo creamy!  I did not prime the wood at all and the paint covered it beautifully!  After the paint had dried (somewhat), I lightly sanded portions of the trim and added Distress Ink Vintage Photo to the sanded areas. 

after I edited the first photo, I decided that another leaf was needed in the bottom corner!

I was very pleased that this turned out!  I just need to decide where to hang it! 

I am also very thankful for the visits here and comments that you leave.  They really do inspire me!

'Till next time......................


Sunday, October 9, 2011

Metallic Rock

Hey there People!  How has your weekend been so far?  I spent the ENTIRE day yesterday in my room creating!!  Unfortunately, I can only share one project now (what a tease!) as the other projects are for publication!  Very exciting, not to mention, nerve racking, for me!!

By now, you'd think I'd have male teen cards down to a science.  NOPE.  While I have no clue as to what type of cards to make for female teens, I find I struggle with the male teen cards in a whole different way.  All these kids are into Xbox, paintball and air soft guns and music.  Great!! Except, how many different cards can one come up with, year after year, with these same themes?!!  I'm tellin' ya~~~teens are a difficult bunch, in more ways than one!! hehe


For the life of me, I could not get a decent picture of this card to save my life!  The background is a piece of Rock Star black metal embossed with the Alterations texture fade embossing folder Sheet Music.  I sanded off the raised portions, exposing the aluminum metal.  The guitar is from Inkadinkadoo's Rock Star, and was stamped with SU's Riding Hood Red.  I then used my VersaMarker to go over the main body and the top of the guitar neck (I have no idea what the proper terms for these areas are called.  Basically, the solid portions!) and clear embossed with Ranger clear embossing powder.  I think the combination of the metal and the shiny embossing is what did this photo in!  To much shine and glare no matter what angle I tried!

To finish it off, I stamped the sentiment, from Tami Mayberry's Live Life Loud, in the corner with more Riding Hood Red.  Pretty CAS, but perfect for a teenager to give to his buddy! No gush allowed!

I'm going to try and clean up this mess so that I can finish up another project that I have in the works!  I'm on a creative roll and I need to keep it going before the mojo decides it needs another break!! 

'Till then................take some time for exploring some creativity in what ever medium tickles your fancy!

Tuesday, October 4, 2011

Nightfall

Hey People!!  Bet you are surprised to see  me so soon, huh?!!  Well, I thought I'd pop in and share a quick CAS card that I made for one of the young ladies who manages the front desk at our second office. 

As you know, I am surrounded by testosterone in my family. Even the dog struts how much testosterone he has.  And not being a girly girl myself, I REALLY struggle with girly cards.  Especially, tween, teen or early 20's  girly cards.  Seriously.  That is a whole world I have NO CLUE about. But, with that said, I rather like how this card turned out!!

I stopped in at my local scrap book store today and the Nightfall paper collection from Memory Box jumped into my hands.  Since I'm horrible at saying "No", I decided to go ahead and bring it home with me.  I absolutely love the colors in this collection!  So, I let the paper do all the work. 


Using the small Martha Stewart Butterfly punch, I punched out 18 butterflies from the collection.  I mixed the patterns of the top and bottom butterflies and attached the two by a rolled glue dot just at the body.  Adhered the bottom butterfly to a 5 1/2" square piece of Pure Ivory luxury card stock with 1/8" Scor-tape.  Folded up the top butterfly wings to add some dimension and stamped the sentiment (retired SU) with Ripe Persimmon Distress Ink (one of the new seasonal inks).  Rounded the corners on the card base and called 'er done!!

The layout is one I've seen used quite frequently throughout blog land.  I like how it showcases the butterflies. 

Like I said, a quick, CAS card!!  Works for me!! 

'Till next time...............remember to explore some type of creativity!!